Step 1: Cut 19 mm from the 8.5" side of your 8.5 by 11" paper or print and trim the pdf as indicated.


Step 3: Fold the upper side edges into this crease.
I would like to leave it at that, but it really is nicer if you can leave 1 mm of space between the edge of the paper and the step 2 crease, and it's really no harder to do.


Step 4: See the point where the two edges meet? Fold the paper straight down along that point.


Step 5: Refold the side creases.

Step 6: Turn it over and fold it in half.

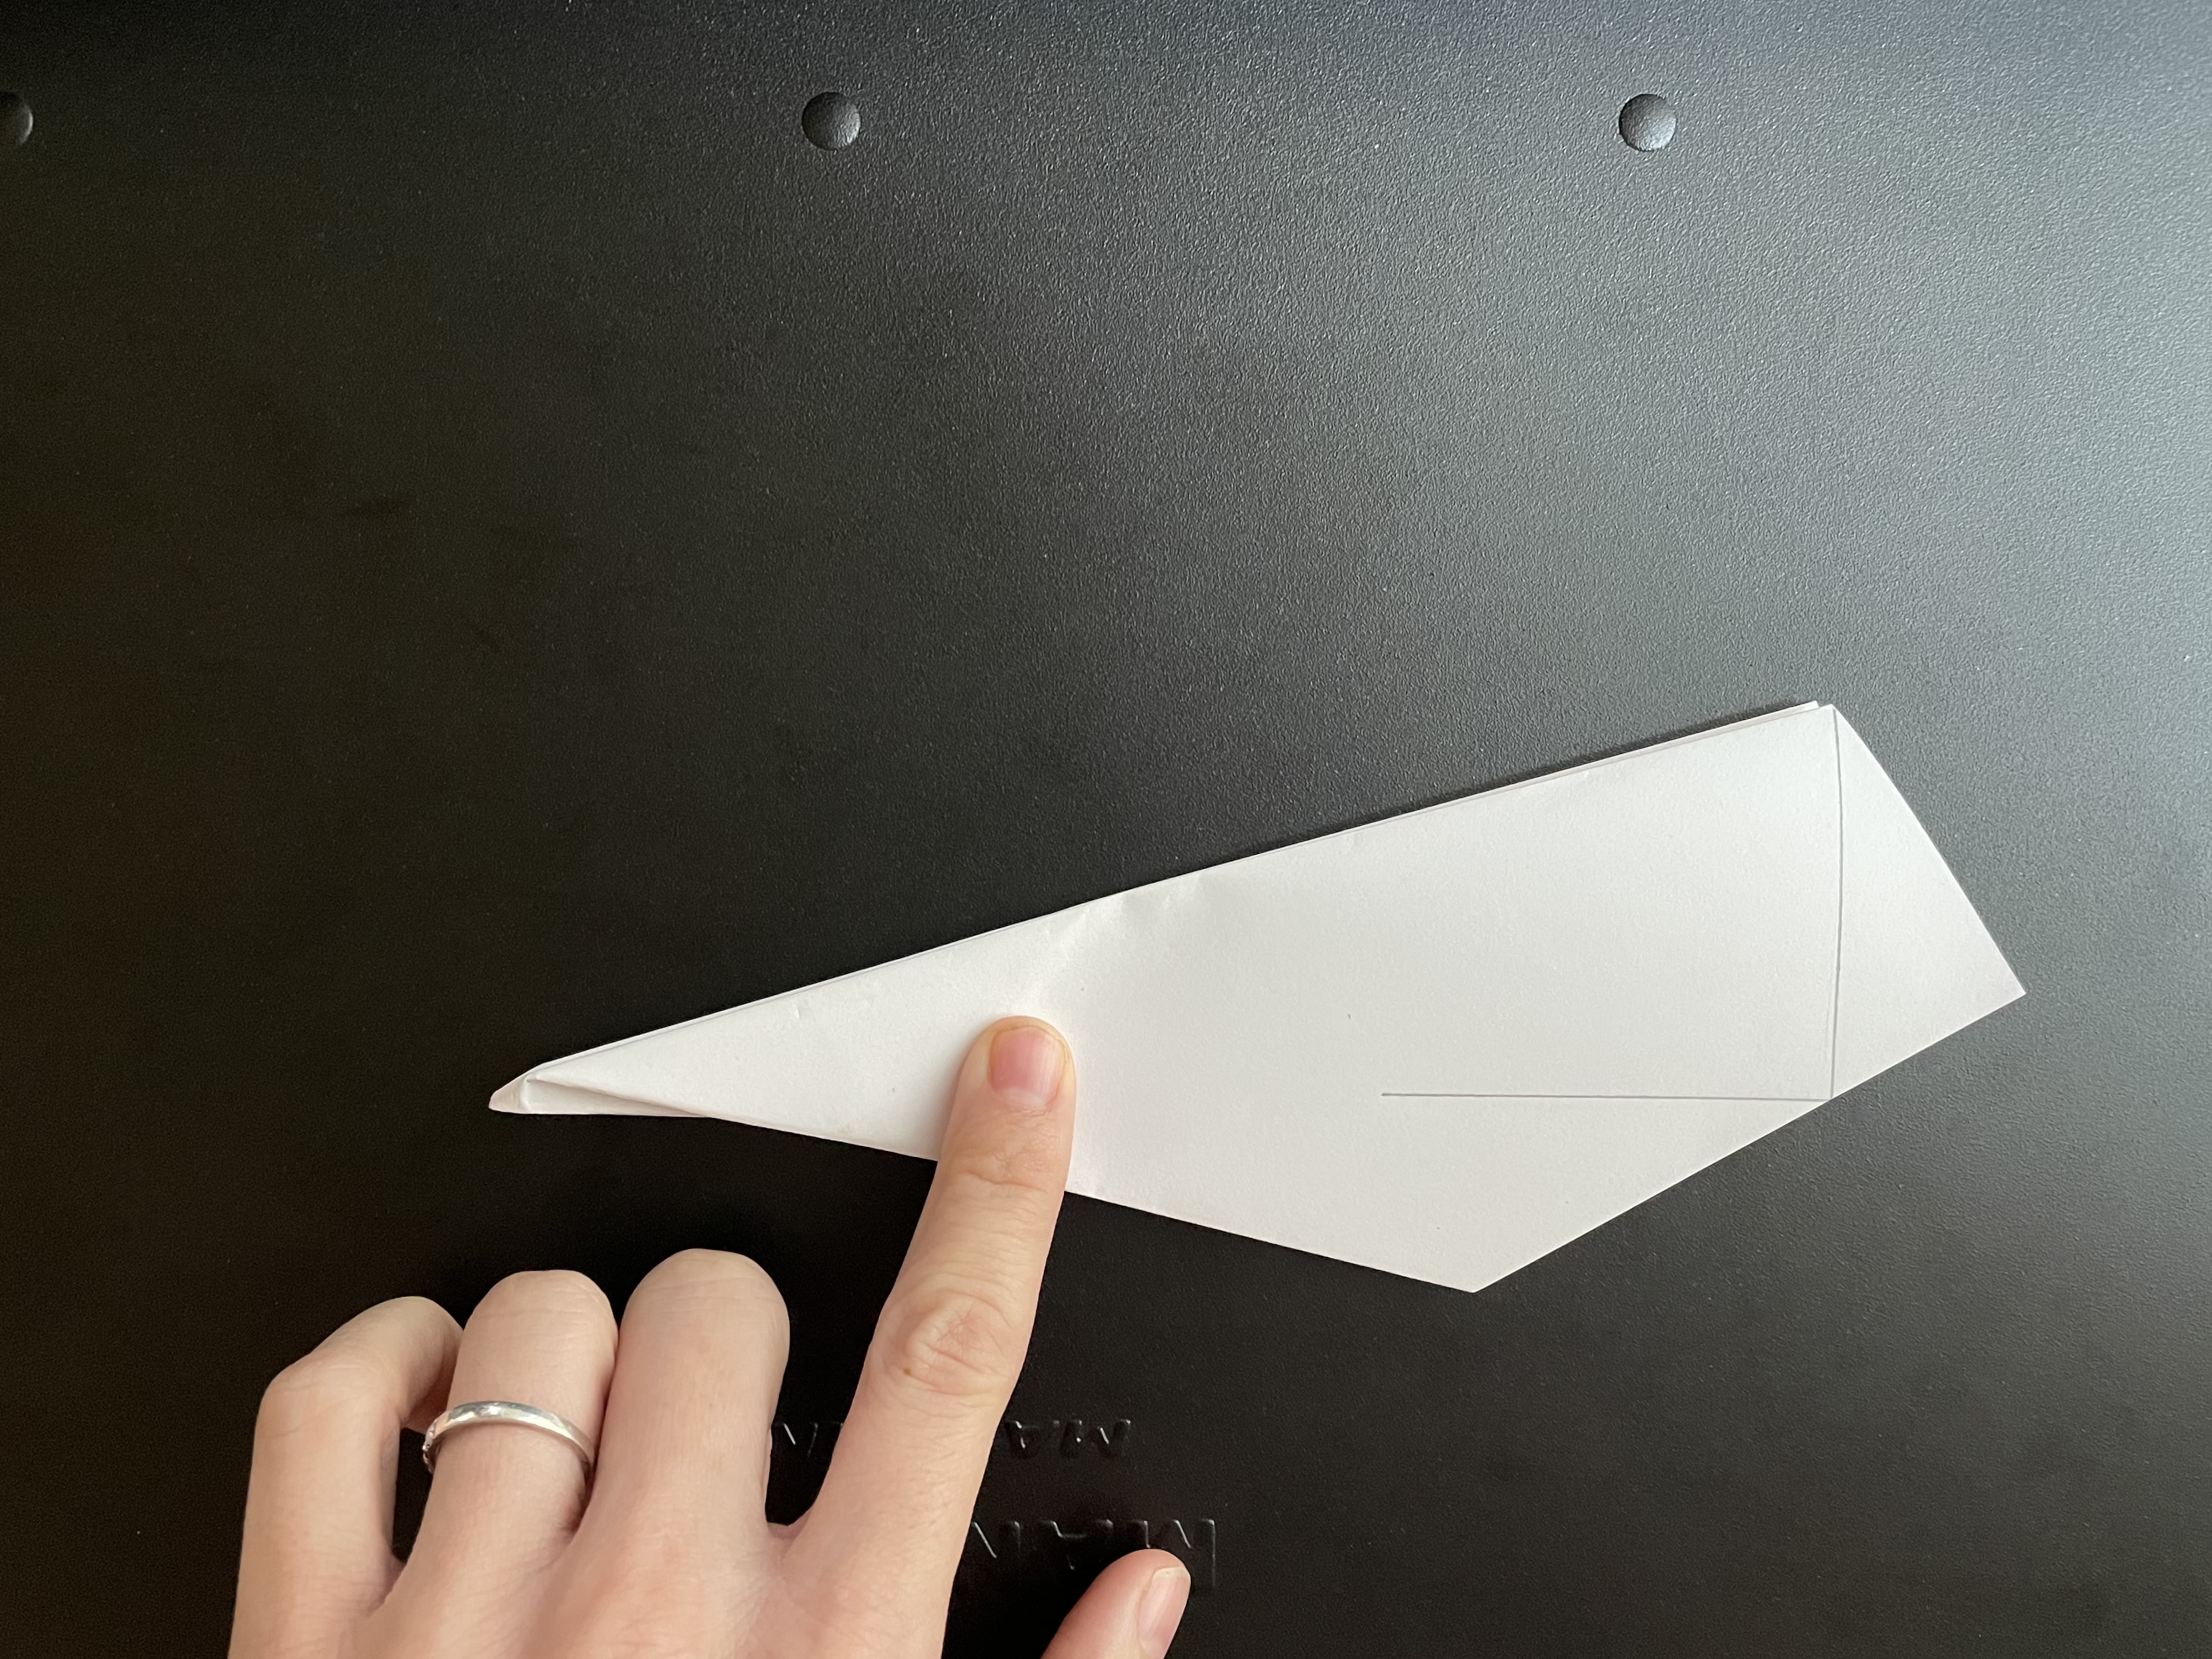
Step 7: Fold wings so they look like this.
Leave a little space (6 mm) above the nose and fold at the angle where the square on the bottom of the body just disappears under the wings.

Step 8: Pull the wings upwards so they form a slight "Y" shape instead of a "T."

Step 9: Tape up the seams a bit, bend the back end of the wings up slightly, and throw it at your kids.
Ideally, the bottom of the plane, the back of the tail, the folds under the wings, and the top seam are all sealed.

PS. This John Collins video also shows you how to make The Boomerang I, The Boomerang II, The Bat Plane, and The Tumbling Wing.
Thanks!big help!
ReplyDelete